Ventoy
Ventoy is an useful tool that can create USB drives which can have more than one ISO at once, rather than traditional ISO writers, which can only use one ISO at a time. You need Windows or Linux to create a Ventoy drive initially, but you can add/remove ISO files to it on any system that supports exFAT.
This guide uses a template for ventoy releases, you will have to replace
1.0.xxwith the current ventoy release name.
Installation
Section titled “Installation”Windows
Section titled “Windows”- Go to Ventoy’s GitHub page
- Click on
ventoy-1.0.xx-windows.zip - Extract the downloaded zip and open
Ventoy2Disk.exe - If your machine supports GPT/UEFI, click on options and select GPT as partition style, if your machine requires Secure Boot, select “Secure boot support”
- Choose your USB drive from the dropdown menu and hit install. All data on it will be wiped.
-
Open your web browser, go to the Ventoy’s GitHub page and click on the
.tar.gzfile. Wait for the downloads to finish. -
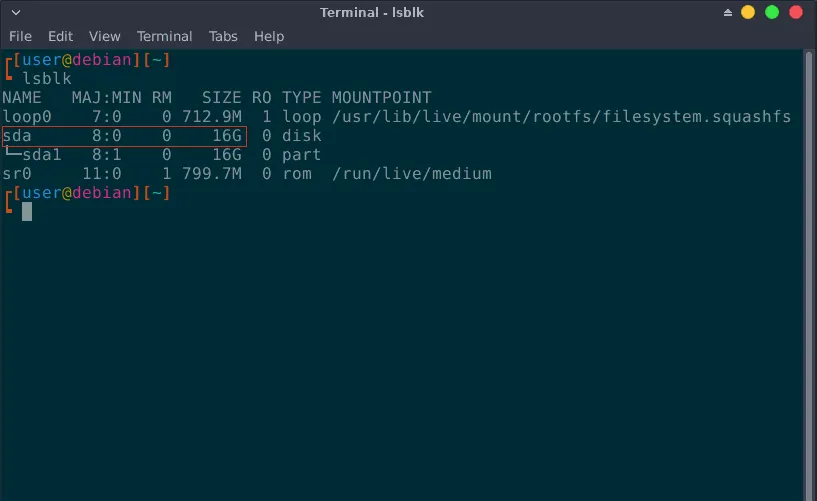
Open Terminal, find your USB’s directory by looking at the size. In this case the USB drive is 16GB, labeled
sda:
-
Run
cd ~/Downloadsfollowed bytar -xf ventoy-1.0.xx-linux.tar.gz. -
Run
cd ./ventoy-1.0.xx, followed bysudo ./Ventoy2Disk.sh /dev/sdX -i. This will delete everything on the target drive. Typeyif prompted with a warning.- Replace ‘sdX’ with your flash drives label. If your computer supports UEFI, add the ‘-g’ switch. If it requires secure boot, also add the ‘-s’ switch.
Once you have installed ventoy, you can put any amount of ISO’s onto the newly created “Ventoy” volume, as long as it fits into the USB. Do not mess with the VTOYEFI volume, as it holds Ventoy’s boot data.
A few notable ISOs to download are: Windows 11 Installation ISO, our Linux rescue media, and Our WinPE.
Common issues
Section titled “Common issues”Secure boot key enrolling
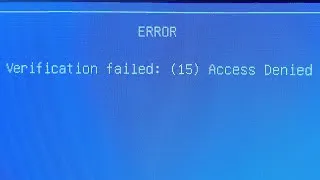
Section titled “Secure boot key enrolling”When booting into a Ventoy stick, you may encounter a screen that says Verification failed: (15) Access denied:

To Fix this:
- Press enter followed by any other key to start the enrolling process
- Once you are facing the enrolling screen, you can navigate with your enter key and arrow keys
- Navigate to the following directory:
Enroll key from disk->EFI->ENROLL_THIS_KEY, once the key is selected press Enter - Ventoy will now restart and boot properly after
Black screen after booting
Section titled “Black screen after booting”- Try disabling Secure boot and Fast Boot, as these can intefere with the stick
- If the stick was installed in the GPT format while your machine doesn’t have UEFI support, you need to remake the usb as MBR.
- If your machine supports UEFI, the exact opposite may be the case. If the usb was made as MBR, you need to have CSM (Compatibility Support Module) enabled in your BIOS. Newer BIOSes often have the option labelled as “Boot type,” in which case you can choose “UEFI + Legacy.” Keep in mind that GPT (UEFI) is preferred over MBR.
- If the stick still refuses to boot after performing the previous steps, try remaking the usb, using a different port, or a different usb altogether.