
Installing Windows without external drives
CautionThis guide will help you install or reinstall Windows without needing a USB flash drive or DVD. It will involve deleting your primary Windows partition during installation. Back up any important data before continuing.
Prerequisites
Section titled “Prerequisites”- A Windows ISO file downloaded from Microsoft such as Windows 11.
- A currently working Windows installation (even temporary).
- At least 10 GB of free space on your drive to create a temporary install partition.
Importantif you download the ISO using Microsoft Media Creation Tool (MCT) follow Method 1, if you download the ISO directly from Microsoft Website follow Method 2.
Preparing the install partition
Section titled “Preparing the install partition”-
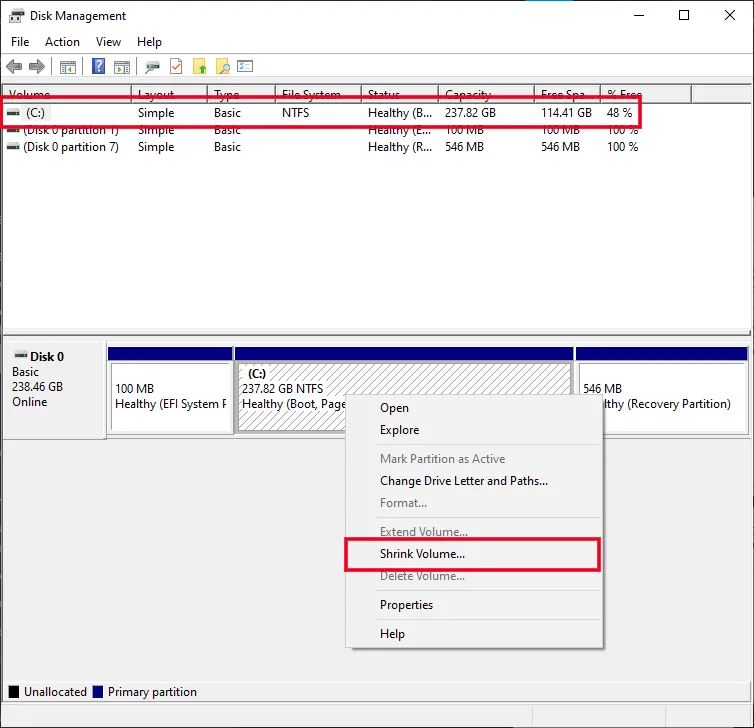
Press your Windows+R and type diskmgmt.msc, then press enter.
-
Right-click your main partition (usually C:) and select Shrink Volume.
-
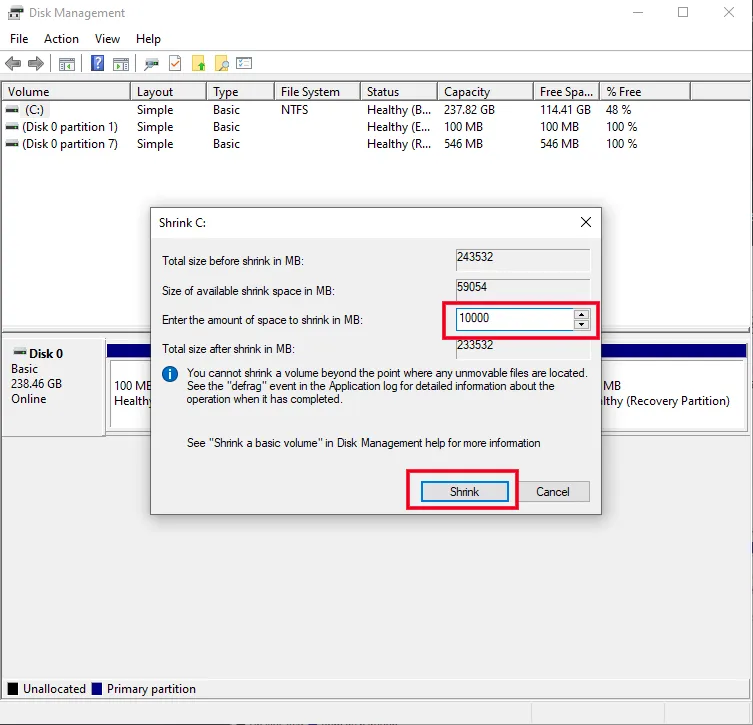
Shrink the volume by at least 10,000 MB (~10 GB) to create enough space for the installer.
-
After shrinking, a new block of unallocated space will appear. Right-click it, select New Simple Volume, format it as FAT32, and label it
INSTALL.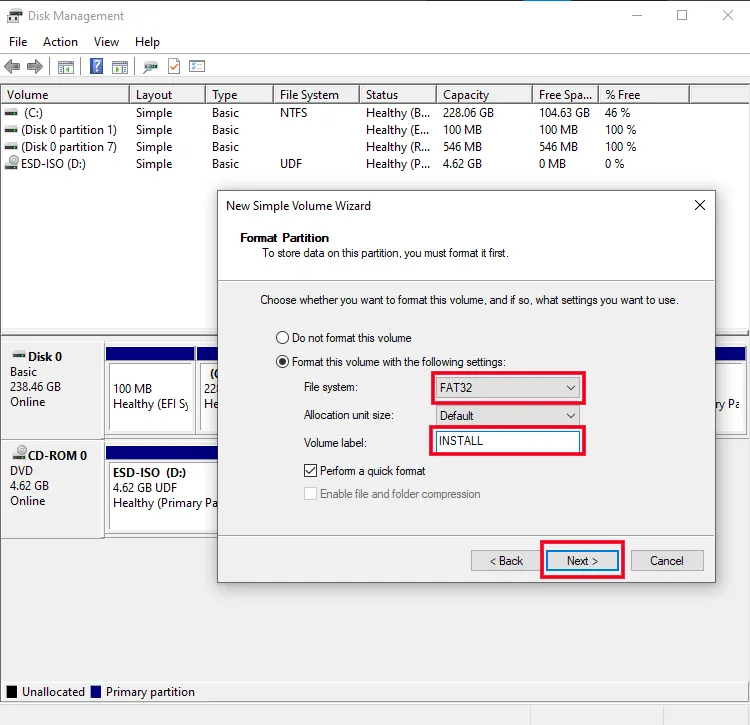
Method 1
Section titled “Method 1”- After downloading the ISO using Media Creation Tool:
-
Double-click the downloaded ISO to mount it.
-
Copy all files from the mounted ISO to the new
INSTALLpartition.TipYou can press
Ctrl + Ain the mounted ISO window and thenCtrl + C, then paste to the INSTALL drive.
Method 2
Section titled “Method 2”- After downloading the ISO from Microsoft Website:
-
Double-click the downloaded ISO to mount it.
-
Copy all files from the mounted ISO to the new
INSTALLpartition except a folder namedsources. -
Copy the folder named
sourcesfrom the mounted ISO to the C partition root. -
Open Command Prompt as Administrator then run the following command:
Dism /Split-Image /ImageFile:C:\sources\install.wim /SWMFile:C:\sources\install.swm /FileSize:4700 -
After splitting the Windows Image, delete it:
del C:\sources\install.wim -
Copy the file named
sourcesfrom C partition to the newINSTALLpartition then Shutdown your PC.
Reboot into the installer
Section titled “Reboot into the installer”- Boot into BIOS.
InformationHold Shift key and click Restart to open WinRE. Click
TroubleshootthenUEFI Firmware Settings, this will redirect you to BIOS.
- You should see a new boot option called UEFI OS.
- Select it to boot into Windows Setup.
Installing Windows
Section titled “Installing Windows”CautionWhen you reach the partition selection screen, be sure NOT to delete the
INSTALLpartition until after the rest of Windows is installed. This will be the partition that shows up as 9.77GB in the list.
-
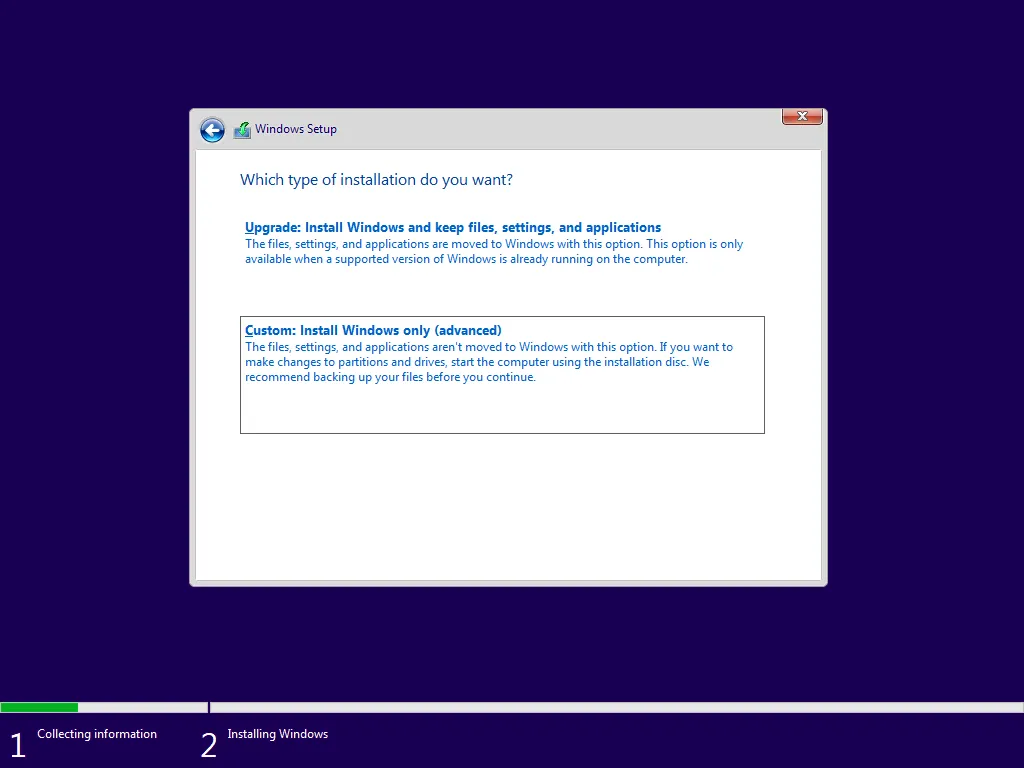
Navigate the initial menus until you get to the screen asking which type of installation you want.
-
Click “Custom: Install Windows only (advanced)”
-
Delete all partitions except the INSTALL partition on the target drive.
-
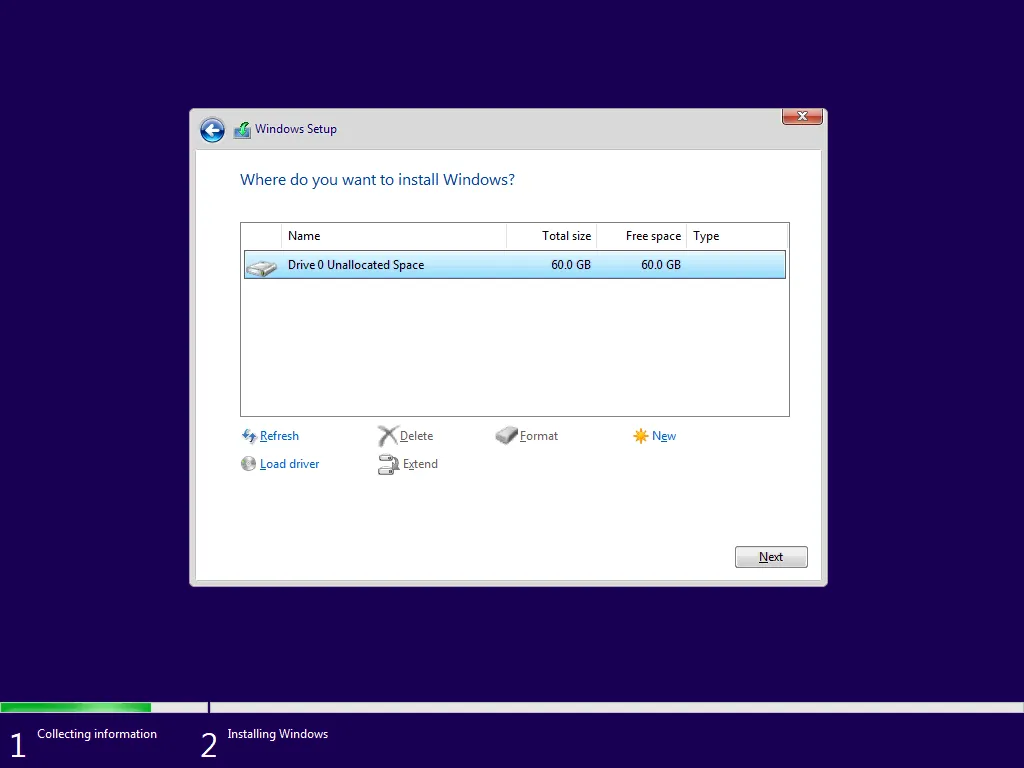
Select the unallocated space, click Next, and let Windows install.
WarningEnsure that you only have partitions with all the same drive nummber in this window before deleting. If you see any drive other than “Drive 0” as seen in our images, power down and unplug the extra drives that you don’t want to install windows on.
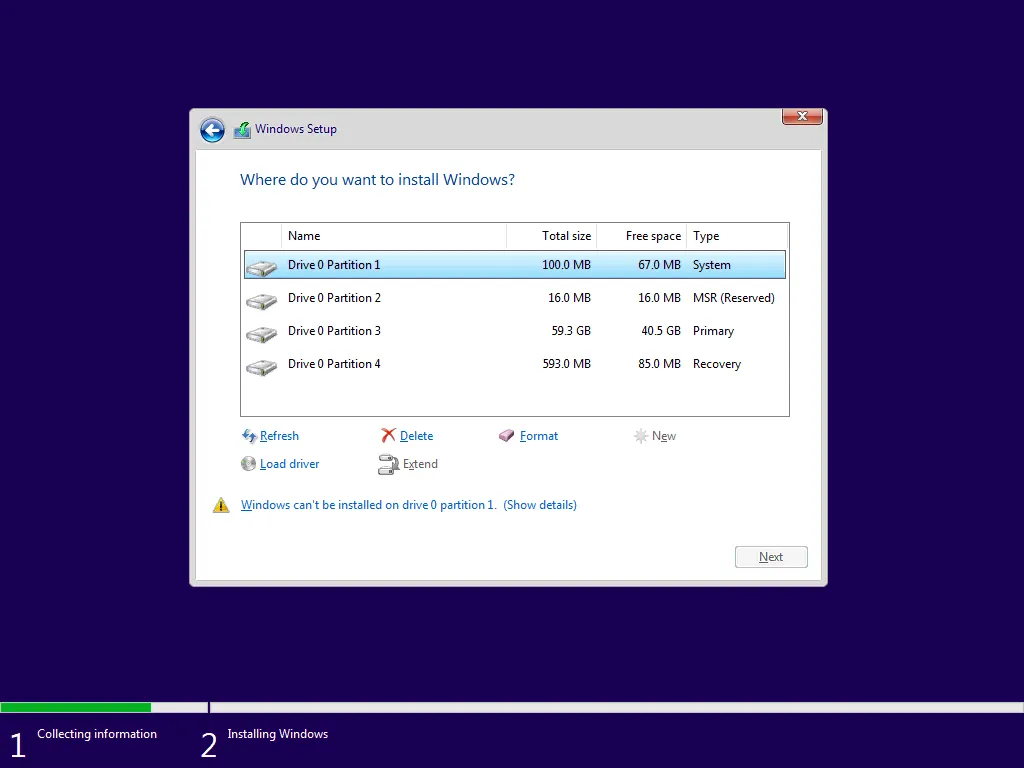
(note that in the generic picture above, there is no ‘Install’ partition)
Final step (optional)
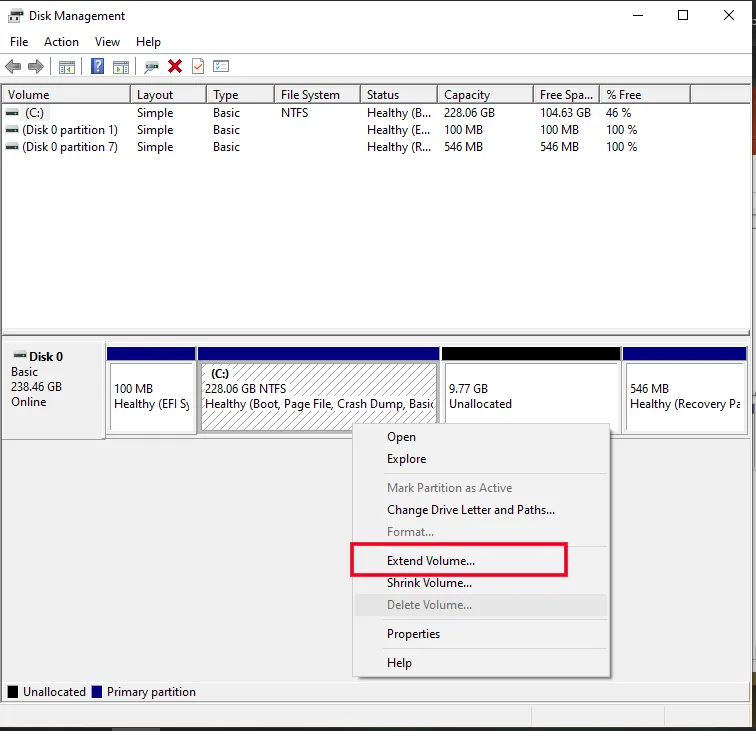
Section titled “Final step (optional)”-
After installation completes and you land on the desktop, press
Win + R, typediskmgmt.msc, delete theINSTALLpartition via Disk Management and extend your main partition to fill the drive.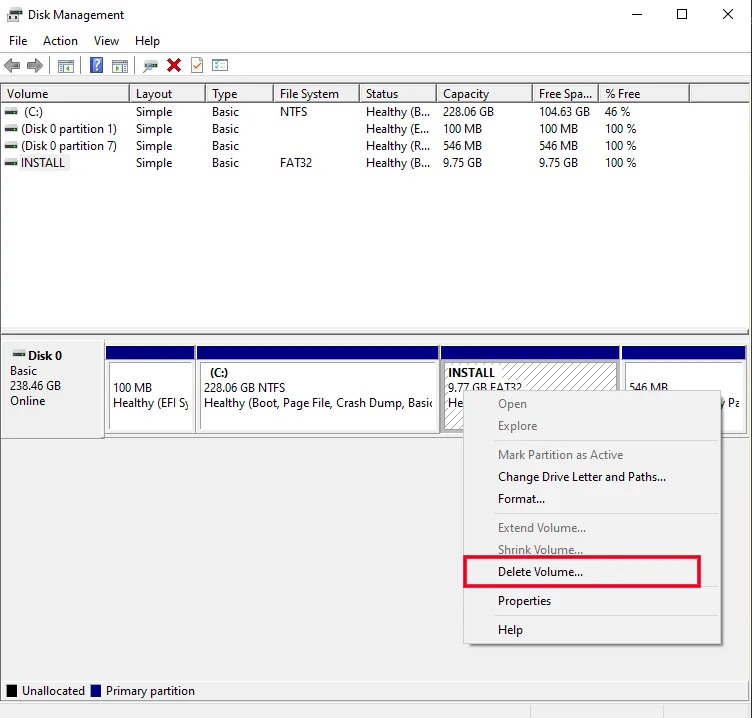
Congratulations!You’ve now installed Windows without external media. This method can be reused any time you need to reinstall your windows without extra tools or drives, so long as you can still boot into Windows. Periodically updating the installation contents is advisable to avoid lengthy update sessions if you decide to use this as a reinstall tool.