How To Troubleshoot a PC That Doesn’t Output an Image
This guide will mention basic steps to help you fix your PC not showing anything on the monitor. Note that this guide is meant to be for a setup that is known to be functional before. If your build is new, there might be other things you want to check. Feel free to ask for help in our Discord.
Table of Contents
When the guide says “HARDWARE ISSUE”, then it means you reached a dead end of troubleshooting unless you have spare parts that you can use or you are willing to buy some. Alternatively you can always just take it to a repair shop and ask them to help you with it or ask family members or friends if you can borrow a part for short time for troubleshooting purposes.
Pre-troubleshooting things to do:
1 - Never touch or move any of the parts inside the computer while its still on. This is important for both your own safety and to prevent accidentally damaging some of the hardware.
2 - Make sure all power cables are properly connected and receiving power. Make sure video cable is in GPU if applicable.
3 - List of hardware parts models and signs of life (this will help you (and us) to locate manuals and have a better look of whats going on and what you can try).
	CPU:
 	Motherboard:
 	RAM:
 	dGPU:
 	PSU:
 	Notes: (for example: fans are not moving, no LEDs, and nothing indicates that it's receiving power)
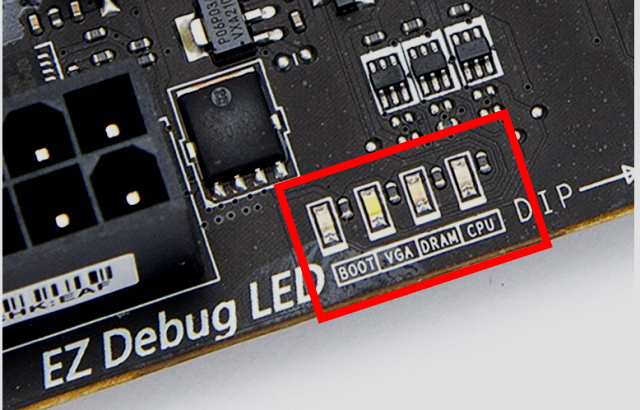
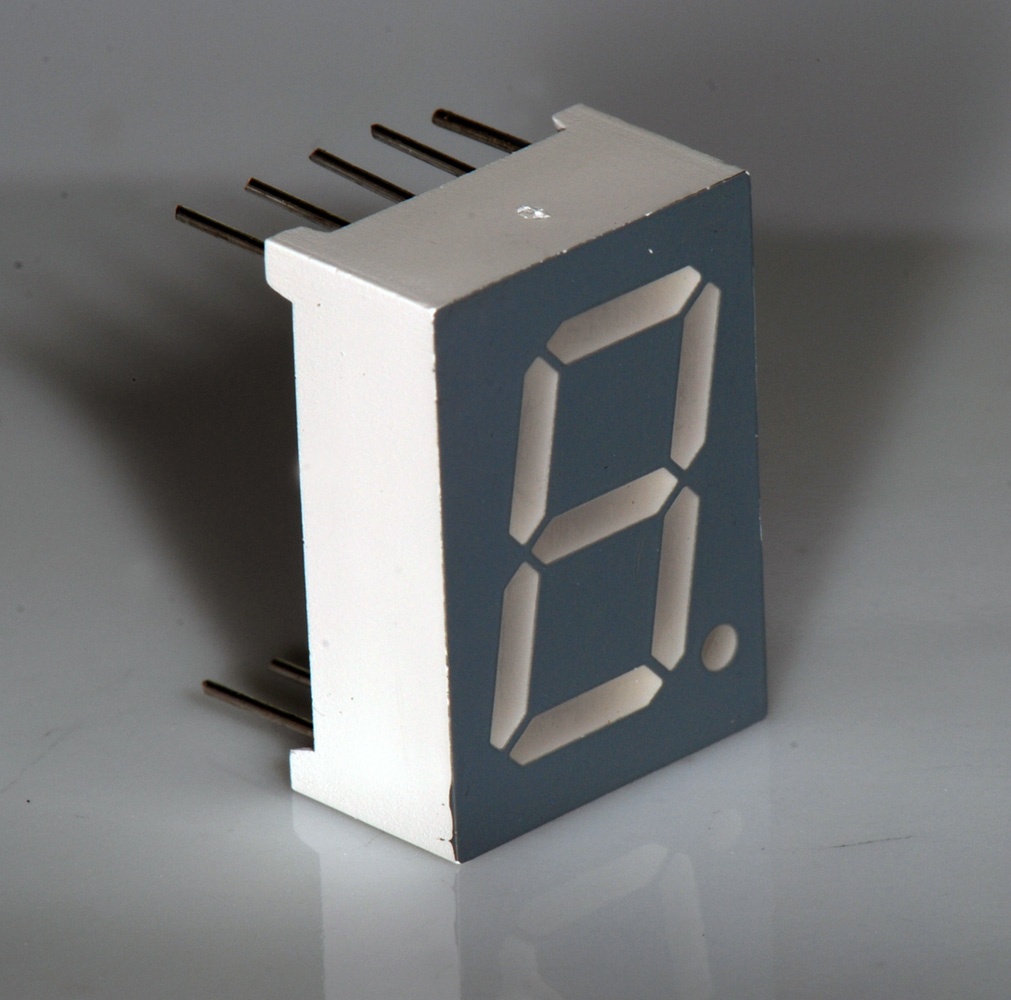
4 - If your motherboard includes a debugging LED, or has a 7-segmented display, or is beeping, take note of the code it is showing.
5 - Ground yourself as good practice. Static electricity can potentially damage components.
Step 1: CMOS reset
Follow this guide to do a CMOS reset.
Step 2: Reseating Components
If you have a debug code that points to a specific part of your computer, reseat them by taking it out and plugging it in again. This ensures a proper connection is made between components. This includes reseating power cables from the PSU to the parts, it doesn’t hurt to reseat every relevant cable.
Step 3: Removing Non-Essential Components
Parts like drives, and other extras like front panel, and other PCIE cards.
A computer does not need a drive to boot. You should be able to reach the BIOS screen, or get a message saying something similar to: “No Boot Disk Detected”.
If removing a non-essential component causes the computer to boot, that means one of the parts you disconnected has caused the computer to stop booting. We have seen failing drives preventing boot a lot of times. It is a common HARDWARE ISSUE. Even a secondary drive (not the OS drive) can cause that.
Step 4: Use only one RAM stick
If the debug LED points to “DRAM”, try removing all RAM sticks and only use one. You also want to try the other sticks and/or try using other RAM slots. If this solves the issue, it is very likely a HARDWARE ISSUE with either a faulty RAM stick or a dead RAM slot on the motherboard.
Step 5: Try your CPU’s iGPU
Some CPUs contain an iGPU, which is a less powerful graphics processor. If you have a CPU with one, its a good idea to try using it. Connect your video cable to the motherboard, instead of the GPU.
Make sure that you unplug your dGPU first because some motherboards disable it when dGPU is detected. If this solves the issue, it is very likely a HARDWARE ISSUE with either the dGPU or the PCIE slot on the motherboard.
Step 6: Using Another Monitor or Video Cable
Sometimes, the issue isn’t with the PC but with the monitor or the cable. It is also possible that the port is what causing it, so switching from HDMI to DisplayPort and vice versa is a good idea. This can indicate that it is a HARDWARE ISSUE.
Step 7: Replacing Parts
This is a HARDWARE ISSUE. This is the hardest to accept as fact. A part has failed and you need to replace it with another. It is also the only way to be sure which part is the one failing in some cases (e.g. CPU or motherboard failure).
If you have any questions, feel free to join our Discord and ask them!